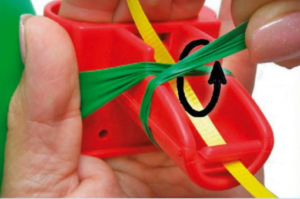
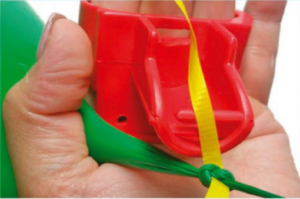
Inflate balloon. Place EZ Tie™ on hand using two or three fingers. Hold balloon against EZ Tie™ with thumb.
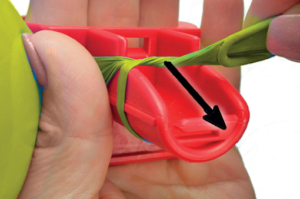
Wrap balloon end around the top of the slanted end of EZ Tie™ and take the opening of the balloon to follow the arrow.
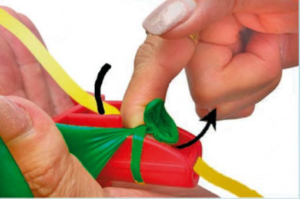
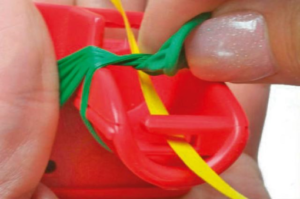
Wrap balloon opening under the stretched balloon.

Grab opening end with two fingers.
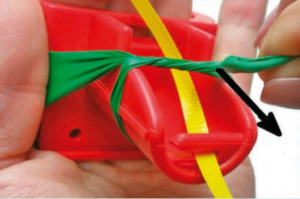
Pull balloon opening away from EZ Tie™.
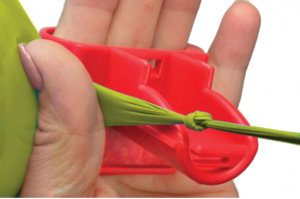
Pull balloon off of the EZ Tie™.
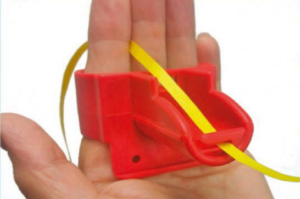
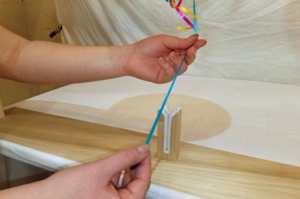
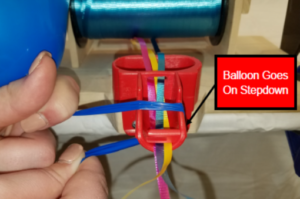
Put ribbon through first two fingers and hook in notch piece on end with ribbon curl up.
Inflate balloon. Place EZ Tie™ on hand using two or three fingers. Hold balloon against EZ Tie™ with thumb.
Wrap balloon end around the top of the slanted end of EZ Tie™ and take the opening of the balloon to follow the arrow.
Wrap balloon opening under the stretched balloon.
Grab opening end with two fingers.
Pull balloon opening away from EZ Tie™.
Pull balloon off of the EZ Tie™, ribbon will slip out of the notch.
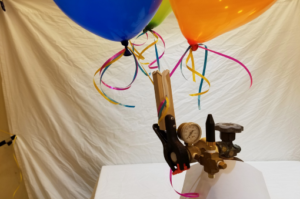
Clip on helium tank or other work surface.
Now you are ready to use the bouquet holder.
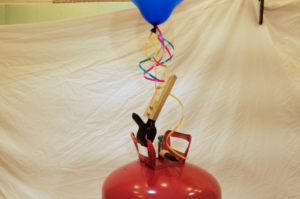
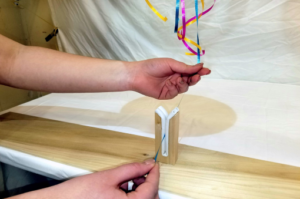
Slip the ribbon down into the slot.
The slot holds the ribbon securely.
You can put several ribbons into the holder at one time and arrange a beautiful bouquet.
The bouquet holder clips to different tanks, tables, chairs, benches, etc.
Fasten the bouquet holder to a table with clamps, screws, etc.
Slip the ribbon down into the slot.
The bouquet holder will secure the ribbon.
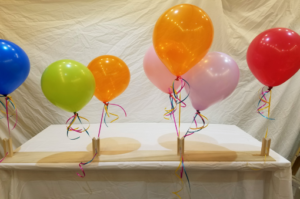
The bouquet holder will secure several ribbons at one time to make beautiful bouquets.
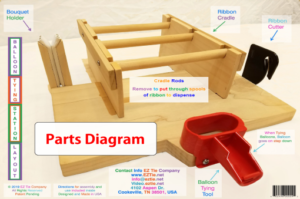
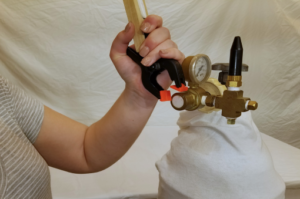
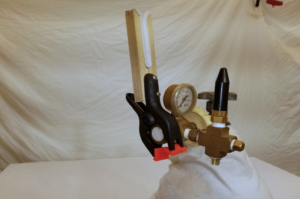
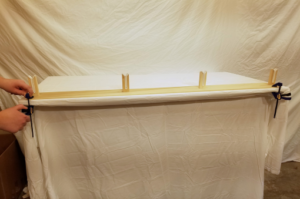
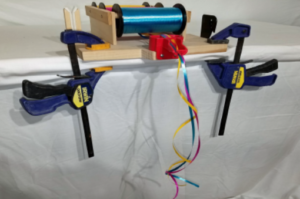
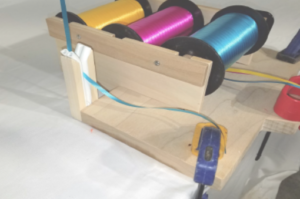
Familiarize yourself with the parts diagram. This will help you prepare and use the balloon tying station properly.
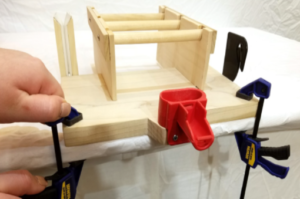
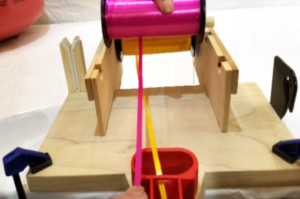
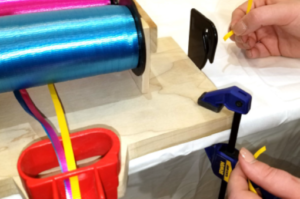
Secure the station to your work surface using a clamp on each side.
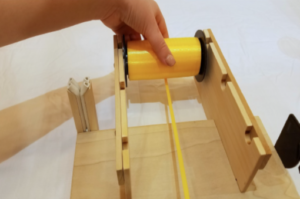
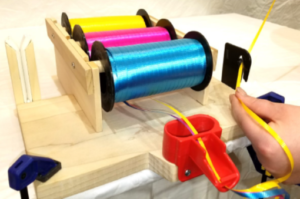
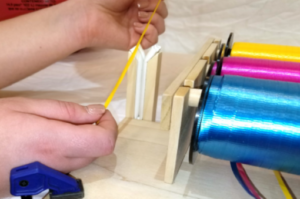
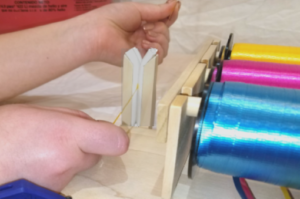
To load the cradle with a spool of ribbon, remove the rod and place it in the center of your spool. Place the rod with the spool in the rearmost slot first. Pull the end of the ribbon to the front of the unit.
Thread the ribbon for use by feeding the ribbon through the first guide slot at the top of the balloon tying tool.
Feed the ribbon through the bottom guide slot at the bottom of the balloon tying tool. Leave 6-8 inches of ribbon hanging out.
Load additional spools in the ribbon cradle beginning with the next rearmost available slot.
Place the second ribbon through both guide slots. Leave 6-8 inches of ribbon hanging out.
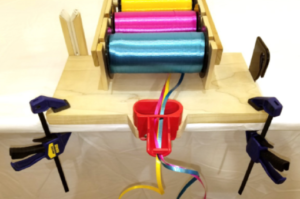
Load the final ribbon spool in the ribbon cradle using the next available slot. You can place 1, 2, or 3 spools of ribbon in the cradle as needed.
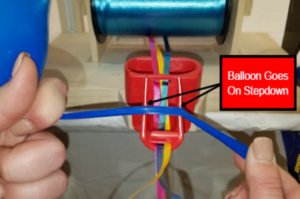
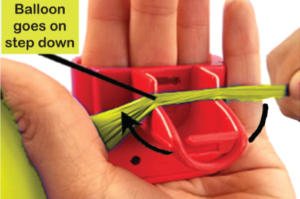
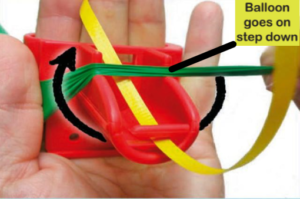
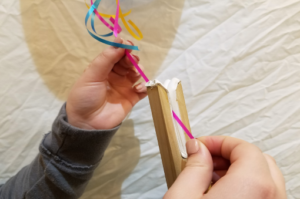
Fill the balloon and stretch the end of the balloon across the top of the balloon tying tool. Ensure the balloon lands on the step down.
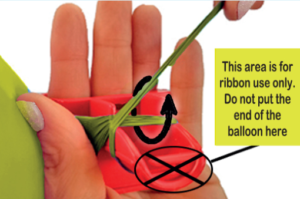
Stretch enough balloon to make the circle. Wrap the opening of the balloon around the balloon tying tool, circling under the step down.
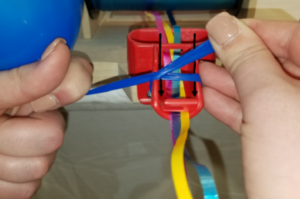
Complete the circle by moving the balloon opening back across the top of the tying tool. Tuck the balloon opening down in the space behind the step down (follow the arrows) and under the stretched balloon.

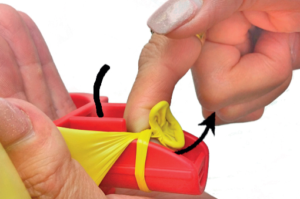
Knot the balloon by tucking the opening of the balloon underneath the stretched part of the balloon from front to back.
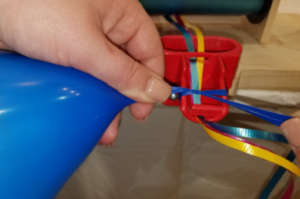
The knot is made when you grab the opening of the balloon with your fingers and pull the balloon off the end of the balloon tying tool.
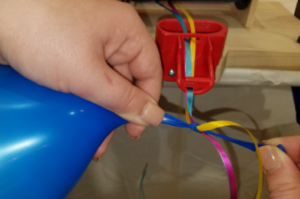
As the balloon slips off the tool, the ribbons are trapped inside the knot. Be sure to make a tight knot in the balloon to secure the ribbons.

Use the following instructions to upgrade your bouquets with extra decorative ribbon length for more beautiful bouquets.
Pull 18-25 inches of ribbon out of the tying station before tying your balloon to the ribbon, and then pull another 18-25 inches out after tying your balloon for decorative purposes.
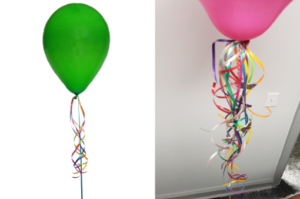
Remember to leave one ribbon longer to anchor your balloon to the arrangement. The extra ribbon length turns into beautiful streamers as part of your balloon arrangement.
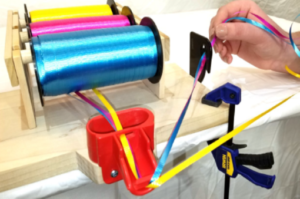
The ribbon cutter is used to trim ribbons to different lengths on the same balloon for decorative purposes. Pick the two colors of ribbon you would like to cut first.

To cut the decorative ribbon on the first two ribbons, hold the balloon in your off hand and use your other hand to pull out several inches of ribbon.
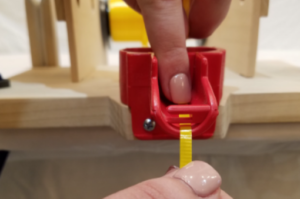
Guide the two ribbons into the bottom of the ribbon cutter and pull these two strands up into the ribbon cutter to make the cut at the desired length.
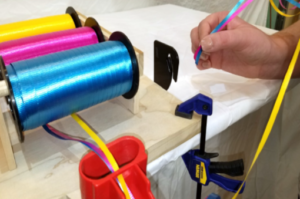
To cut the third ribbon, pull a few feet of ribbon from the final color off the spool and grasp the ribbon just below the length you want to cut.
Guide the third ribbon into the bottom of the ribbon cutter and pull the desired length up into the ribbon cutter to make the cut at the desired length.
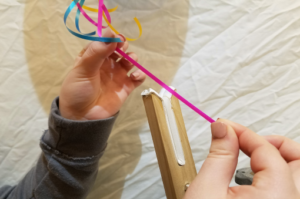
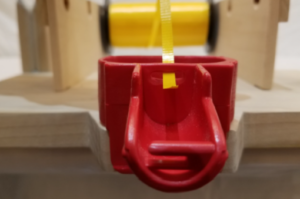
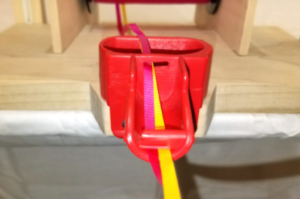
Using both hands, take the bottom of the longest ribbon from your cut balloon and guide it into the slot of the bouquet holder. For best results, guide the ribbon down at least halfway into the slot.
Leave 5-6 inches of ribbon sticking through the bouquet holder. Repeat with additional balloons and reposition the ribbon length as desired to create the perfect bouquet.
Ideally, leave 6-8 inches of ribbon hanging out of the bouquet holder to ensure the balloon stays secure as you add additional balloons to the arrangement.